Support XL200 Printer
Welcome to the Printer Support section.
Here you will find step-by-step video tutorials on how to install, use and maintain your XL200 printer, as well as a troubleshooting guide to help you resolve the most common issues.
🎥 Video tutorial: getting started with your XL200 printer
Quick Guide to Solving Common XL200 Printer Issues
1. Problem: Streaks or Lines in Printed Text
Symptoms
The printout shows horizontal lines or white bands crossing through the text.
Possible Causes and Solutions
There are two main causes. Check both to solve the problem:
1. Funeral ribbon too tight
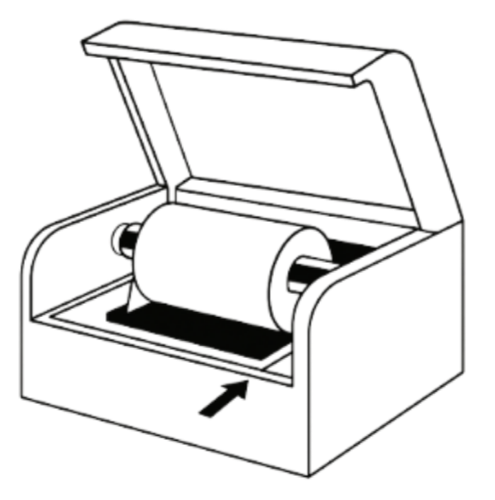
Open the printer cover.
Press the green button to unlock the guide that holds the funeral ribbon in place.
Loosen the guide slightly to allow a bit of slack in the ribbon.
Make sure the ribbon can move freely.
2. Ink ribbon incorrectly installed
Open the printer cover.
Check the position of the ink ribbon:
– It must not go over the black protective bar (this bar can be moved manually).
– Make sure the used film is rewound onto a cardboard core, not directly onto the black plastic shaft.
Final Step
Close the printer cover.
Restart printing to check if the issue is resolved.

2. Problem: Print is Cut in Half or Shifted to One Side
Symptoms
The print is cut in half.
The text is shifted to one side of the label.
In some cases, the printer goes into safety mode.
Step-by-Step Solution
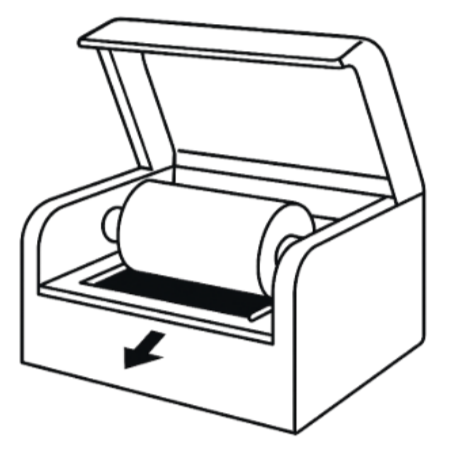
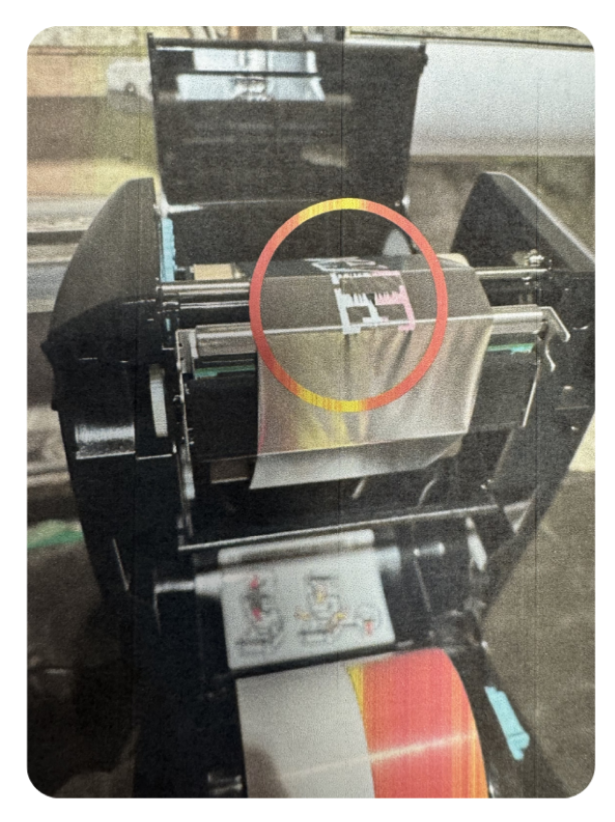
1. Open the cover and remove the ink ribbon
Open your printer cover.
Remove the ink ribbon to access the printhead.
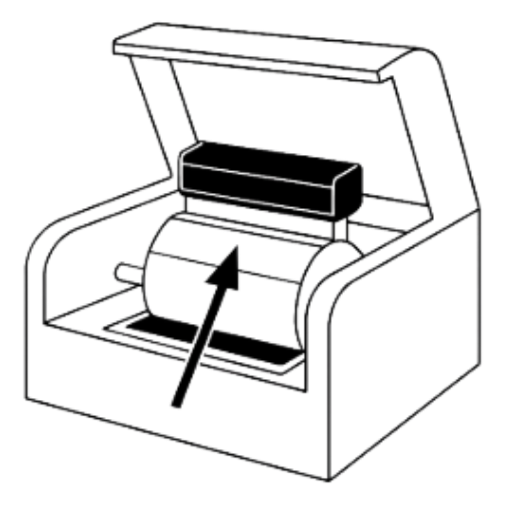
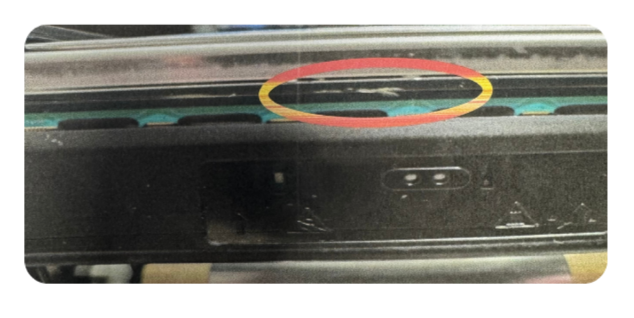
2. Identify the printhead
The printhead is located at the top of the cover.
It consists of:
A metal part with a black plastic cover,
A green section underneath,
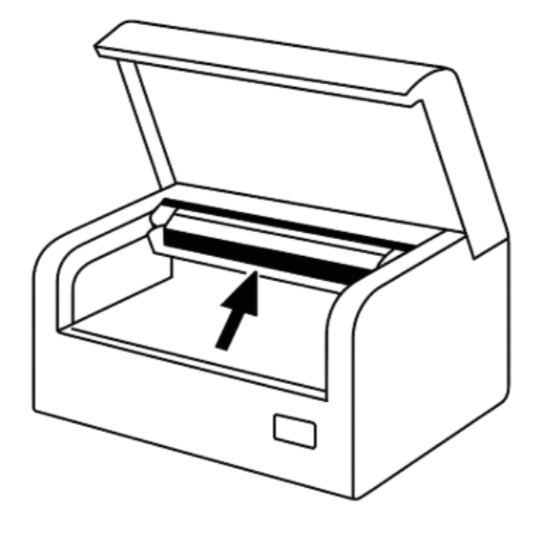
And a very thin metallic strip running across the entire width.
This strip heats the ribbon and must be perfectly clean.
Visually check whether it’s clean or if there are any residues.
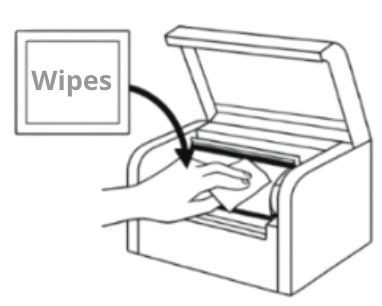
3. Clean the printhead
Use only the cleaning wipes provided with the printer (2 are included with purchase).
If you have them:
Take one wipe.
Gently clean the metallic strip along its entire length.
If necessary, lightly scrape under the wipe with your fingernail to remove stubborn residue.
If you’ve run out of wipes:
You can order more from etiquettes-expert.com, under the Accessories and Cleaning Products section.
4. Reinstall the ribbon and test
Reinsert the ink ribbon correctly.
Close the printer cover.
Run a test print to confirm the issue is fixed.
3. Problem: Missing or Partially Printed Characters
Symptoms
Some areas of the label appear without ink.
Letters or characters are missing.
The print is partial or incomplete.
Likely Cause
An unsuitable or poor-quality funeral ribbon.
Solution – Steps to Follow
1. Open the printer.
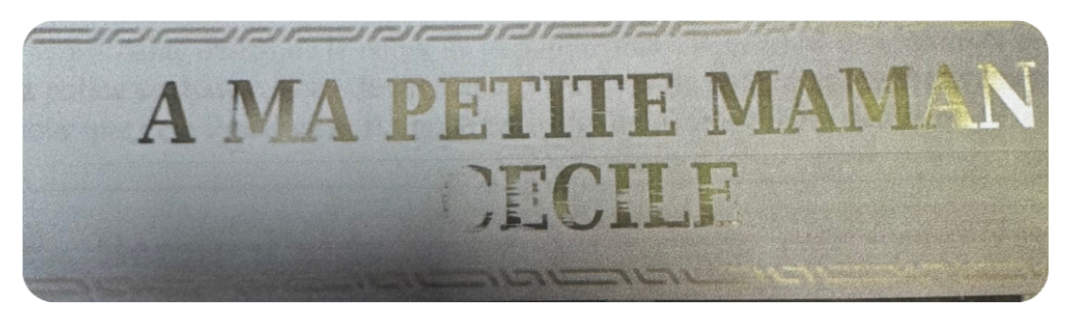
2. Check the ribbon used.
Look at the already-used portion of the ink ribbon.
Normally, printed letters should appear as negative imprints (lighter areas on the ribbon).
3. Inspect ink traces.
Check if the problematic areas on your print correspond to similar traces on the ribbon.
If yes, it means the ribbon is preventing proper ink transfer.
4. Confirm with another ribbon.
Try another funeral ribbon, preferably certified for thermal transfer printing.
If the issue disappears, the original ribbon was unsuitable or defective.
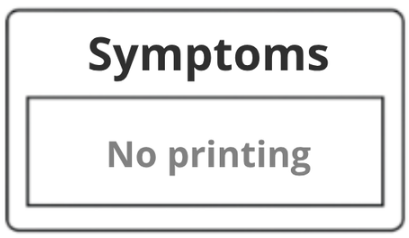
4. Problem: Printer Doesn’t Print at All
Symptoms
No printing appears on the ribbon.
The funeral ribbon feeds normally but without text or images.
Likely Cause
The font was not specified when the print job was sent.
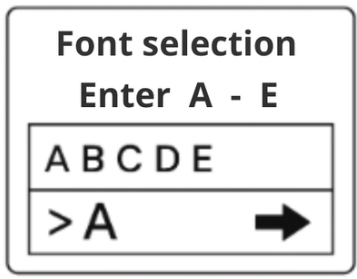
Solution – Steps to Follow
Perform a Live Print Test
From your software or terminal, run a print test.
When the printer asks you to choose a font (between A and E):
Enter the letter corresponding to the desired font.
On older printer versions, the letter must be uppercase to work.
Example: type A instead of a.